Albert Yuebai XU
Fullstack Developer
Track web performance with Google Analytics
This is a research project for discovering the possibility of tracking web performances with Google Analytics. In this project, we have succeed with:
- Track Page Load Time and Transaction Time
- Track User Event Response Time (For example, the time between clicking on the payment button until redirecting to the confirmation page)
Here is the project built with Next.js. I have created several pages to make test secenarios.
1. Track Page Load Time
Description
Normally Google analytics is used to user related information and serves in marketing purposes, such as page views, user regions, user behavoirs. However, Google analytics can also be used to track page loading time, and other timing related metrics.
Average page loading time is one of the default tracking metrics in Google analytics (GA for the following content). It is in Behavoir > Site Speed > Page Timing.
For example, there is a huge loop on the about page, GA can tell us by its longer loading time.
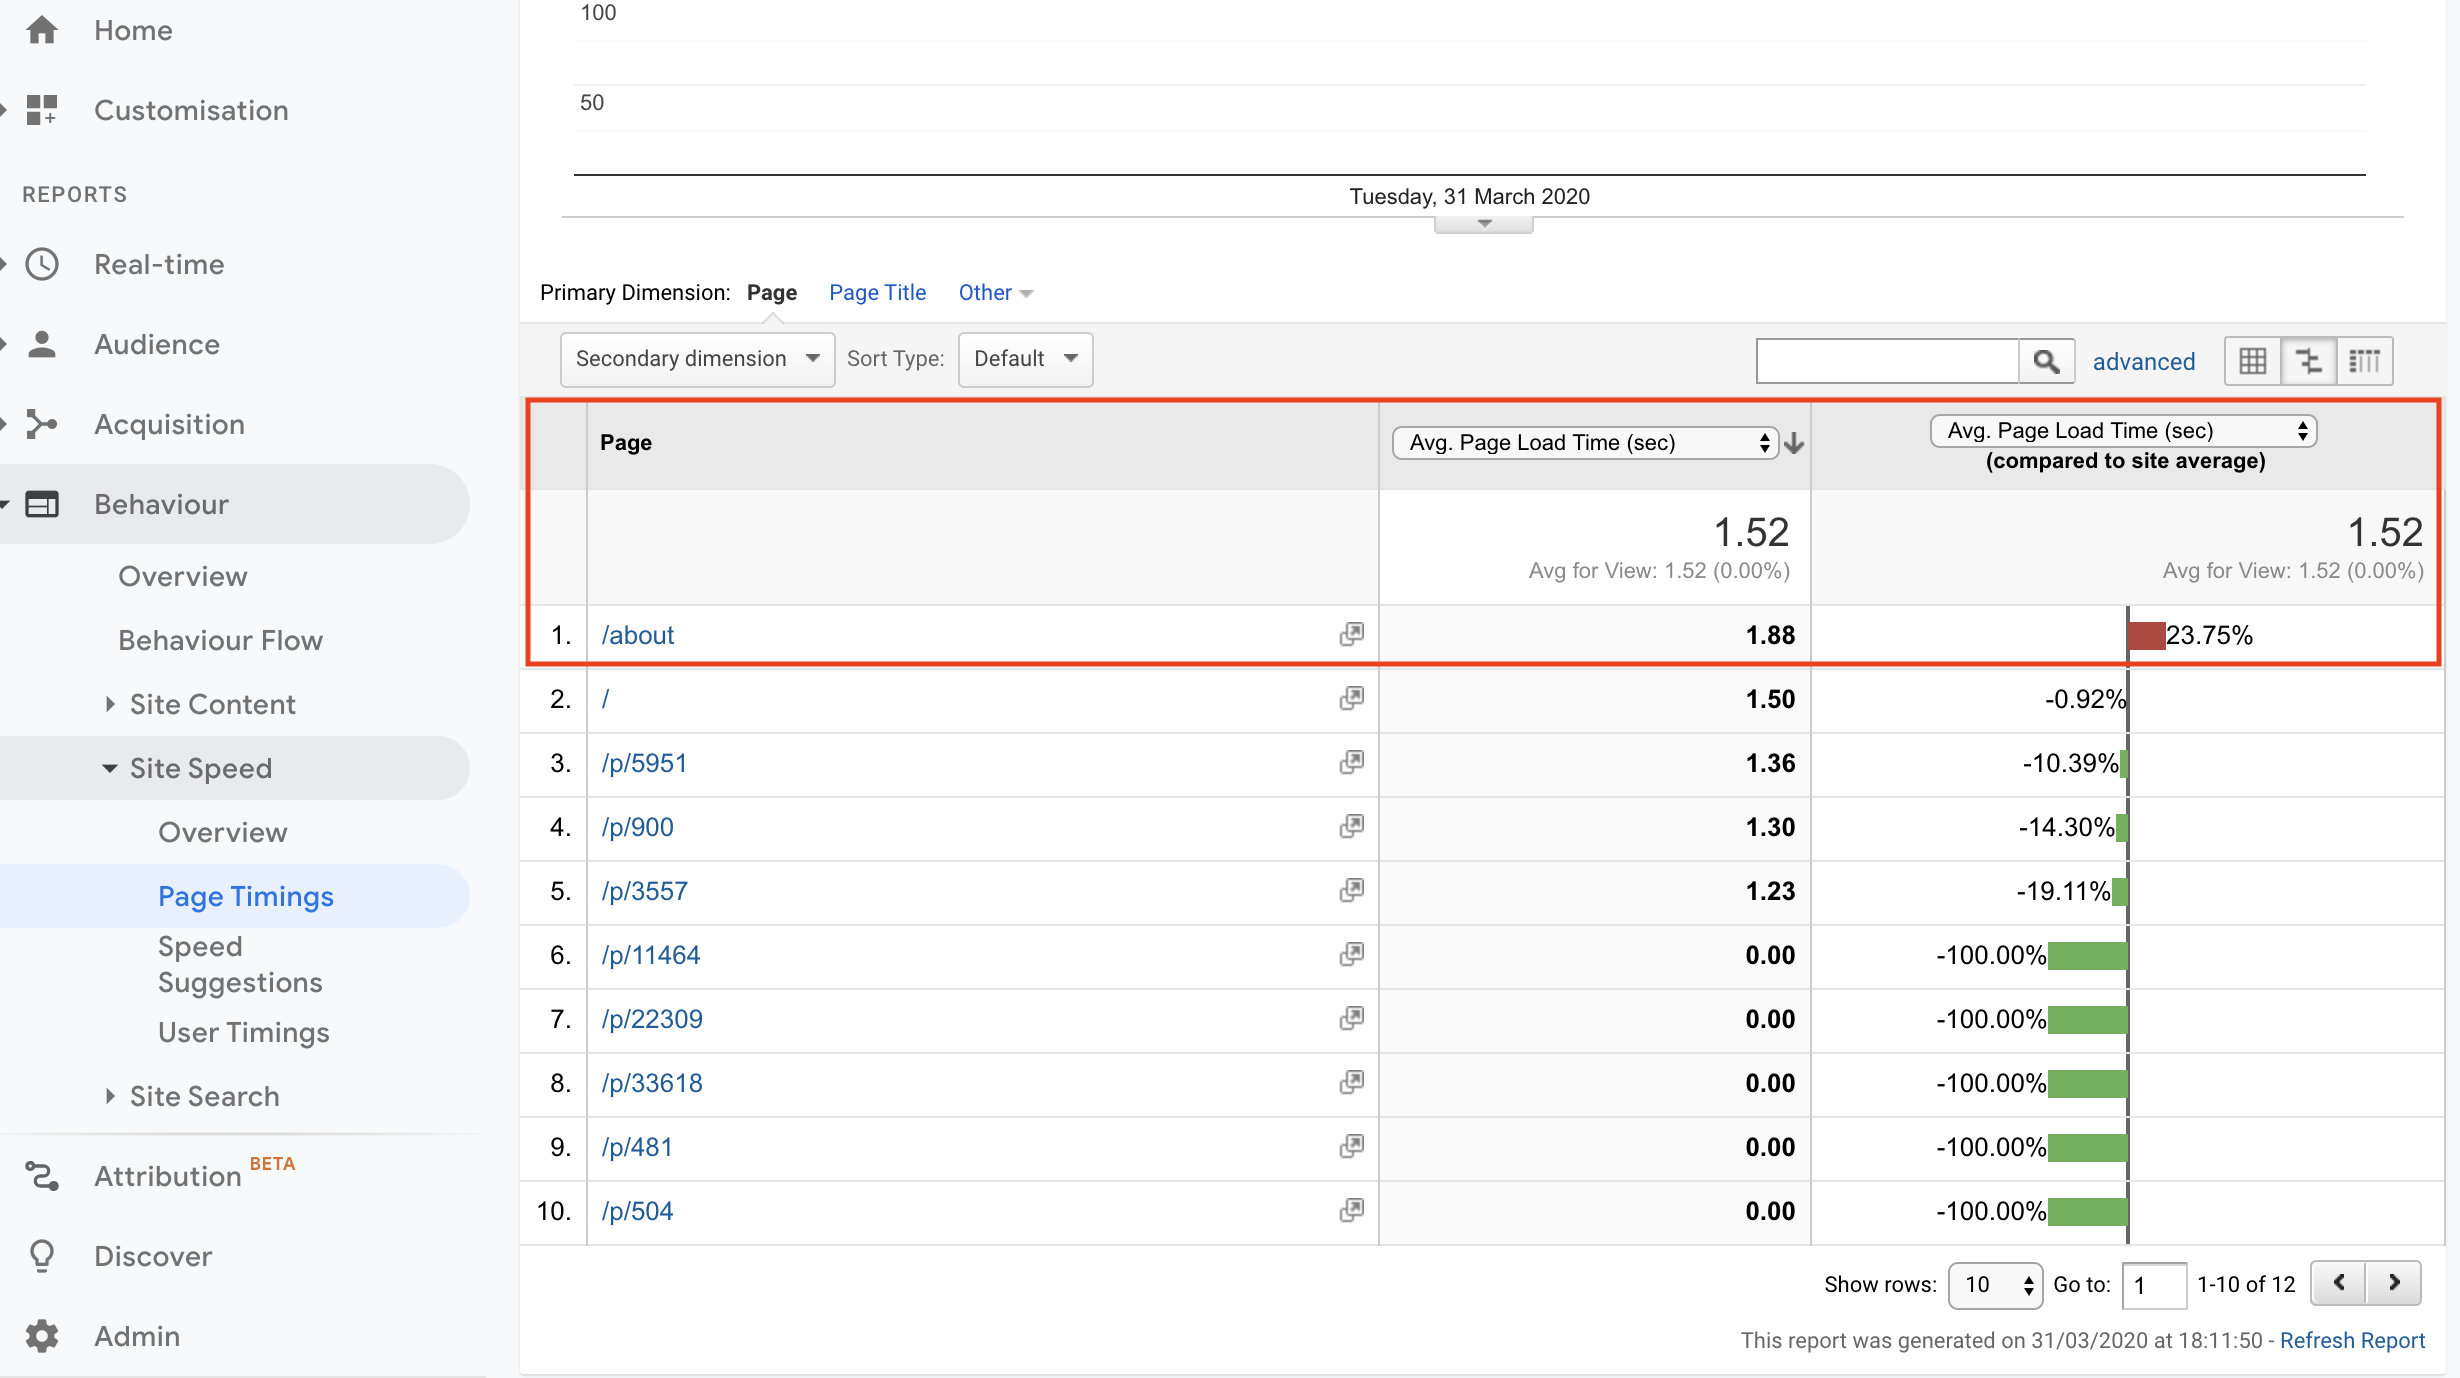
If we choose "Technical" under the "Explorer" panel, we will have more valuable web perf metrics, for example, Redirection Time, Server response time.

Technology
react-ga library
Implementation
Technically, we need to:
- Set up a google analytics account. Here is the official tutorial from Google analytics academy.
- Put the tracking code and intializing script just after the opening tag. If it is a react project, we can use the library react-ga to help with intializing GA and tracking.
- The intializing of google analytics should be done for every page, which means we can do it in Layout component or the Central Routing component. Here is the example how we are doing in this project: In Layout Component,
export default class Layout extends React.Component {
  componentDidMount() {
    if (!window.GA_INITIALIZED) {
      initGA()
      window.GA_INITIALIZED = true
    }
    logPageView()
  }
  render() {
    return (
      <div style={layoutStyle}>
        <Header />
        {this.props.children}
      </div>
    )
  }
}
And in utils,
import ReactGA from "react-ga"
export const initGA = () => {
  ReactGA.initialize("UA-xxxxxxx-x", {
    gaOptions: {
      siteSpeedSampleRate: 100, // need to put 100 here to well track site speed
    },
  })
}
export const logPageView = () => {
  ReactGA.set({ page: window.location.pathname })
  ReactGA.pageview(window.location.pathname)
}
To be noticed
There are points to be noticed:
- Remember to set siteSpeedSampleRate into 100 on intializing if there is not much traffic on the site If we don't set siteSpeedSampleRate to 100 (100%), maybe there will be no data on site loading time. Because by default, GA tracks only 10% or fewer traffic for site speed.
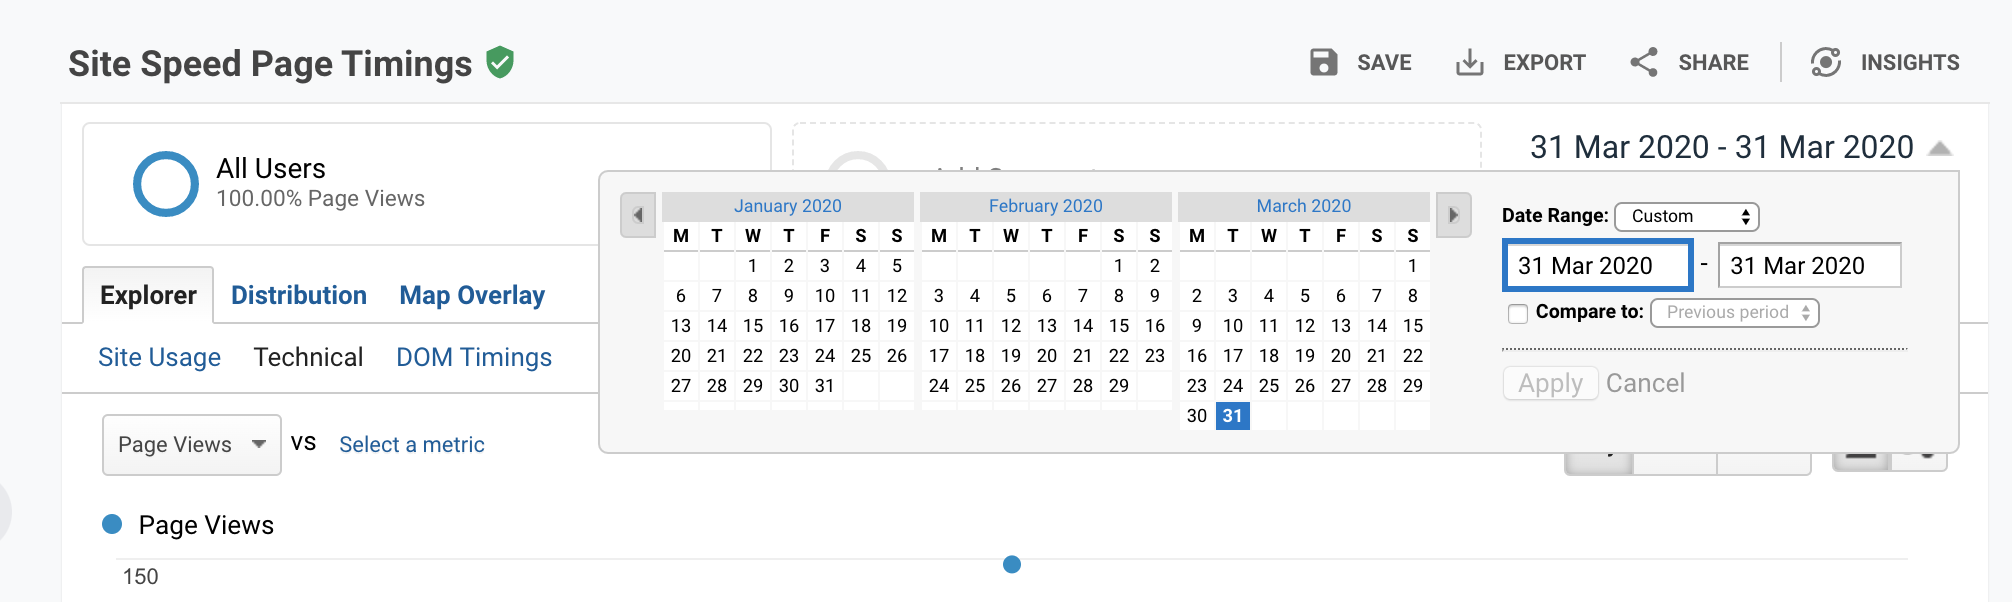
- Remember to modify the range of time if you want to see today's traffic By default, the time range for reports (Audience, Acquisition, Behavoir) are until yesterday. We can modify the time range and set "Hourly" if we want to see today's traffic (useful for developing or debugging).
Conclusion
It is a good start point for measuring web perf, to know which page takes the longest time to load, and to know how it changes overtime.
2. Track User Event Response Time
Description
In order to track user interaction response time, we need the help of gtag.js or google tag manager.
In order to use gtag.js, the library react-ga is not a good idea, because it uses analytic.js, the old version of the script for google analytics, instead of gtag.js, a new version of the script for google analytics. Here is a good example for integrating gtag.js in a project of NextJs.
In order to track user interaction response time, the idea is simple:
- Get the timestamp when the interaction is triggered
- Get the timestamp when the interaction is finished
- Calculate the delta of two timestamp, push the data to google analytics
Technology
- gtag.js
- window.performance.timing API
Implementation
- Implement GA tracking with gtag.js. Here is the implementation for next.js in _document.js.
<Head>
  {/* Global Site Tag (gtag.js) - Google Analytics */}
  <script
    async
    src={`https://www.googletagmanager.com/gtag/js?id=${GA_TRACKING_ID}`}
  />
  <script
    dangerouslySetInnerHTML={{
      __html: `
            window.dataLayer = window.dataLayer || [];
            function gtag(){dataLayer.push(arguments);}
            gtag('js', new Date());
            gtag('config', '${GA_TRACKING_ID}', {
              'sample_rate': 100,
              'site_speed_sample_rate' : 100
            });
          `,
    }}
  />
</Head>-
Track time with gtag.
Here is an example for tracking the payment button.
const treatPayment = ({ setIsConfirmed }) => {
const startTreatPaymentTime = window.performance.now()
setTimeout(function() {
setIsConfirmed(true)
const endTreatPaymentTime = window.performance.now()
const deltaTime = Math.round(endTreatPaymentTime - startTreatPaymentTime)
trackEvent({
action: "timing_complete",
name: "test_name",
value: deltaTime,
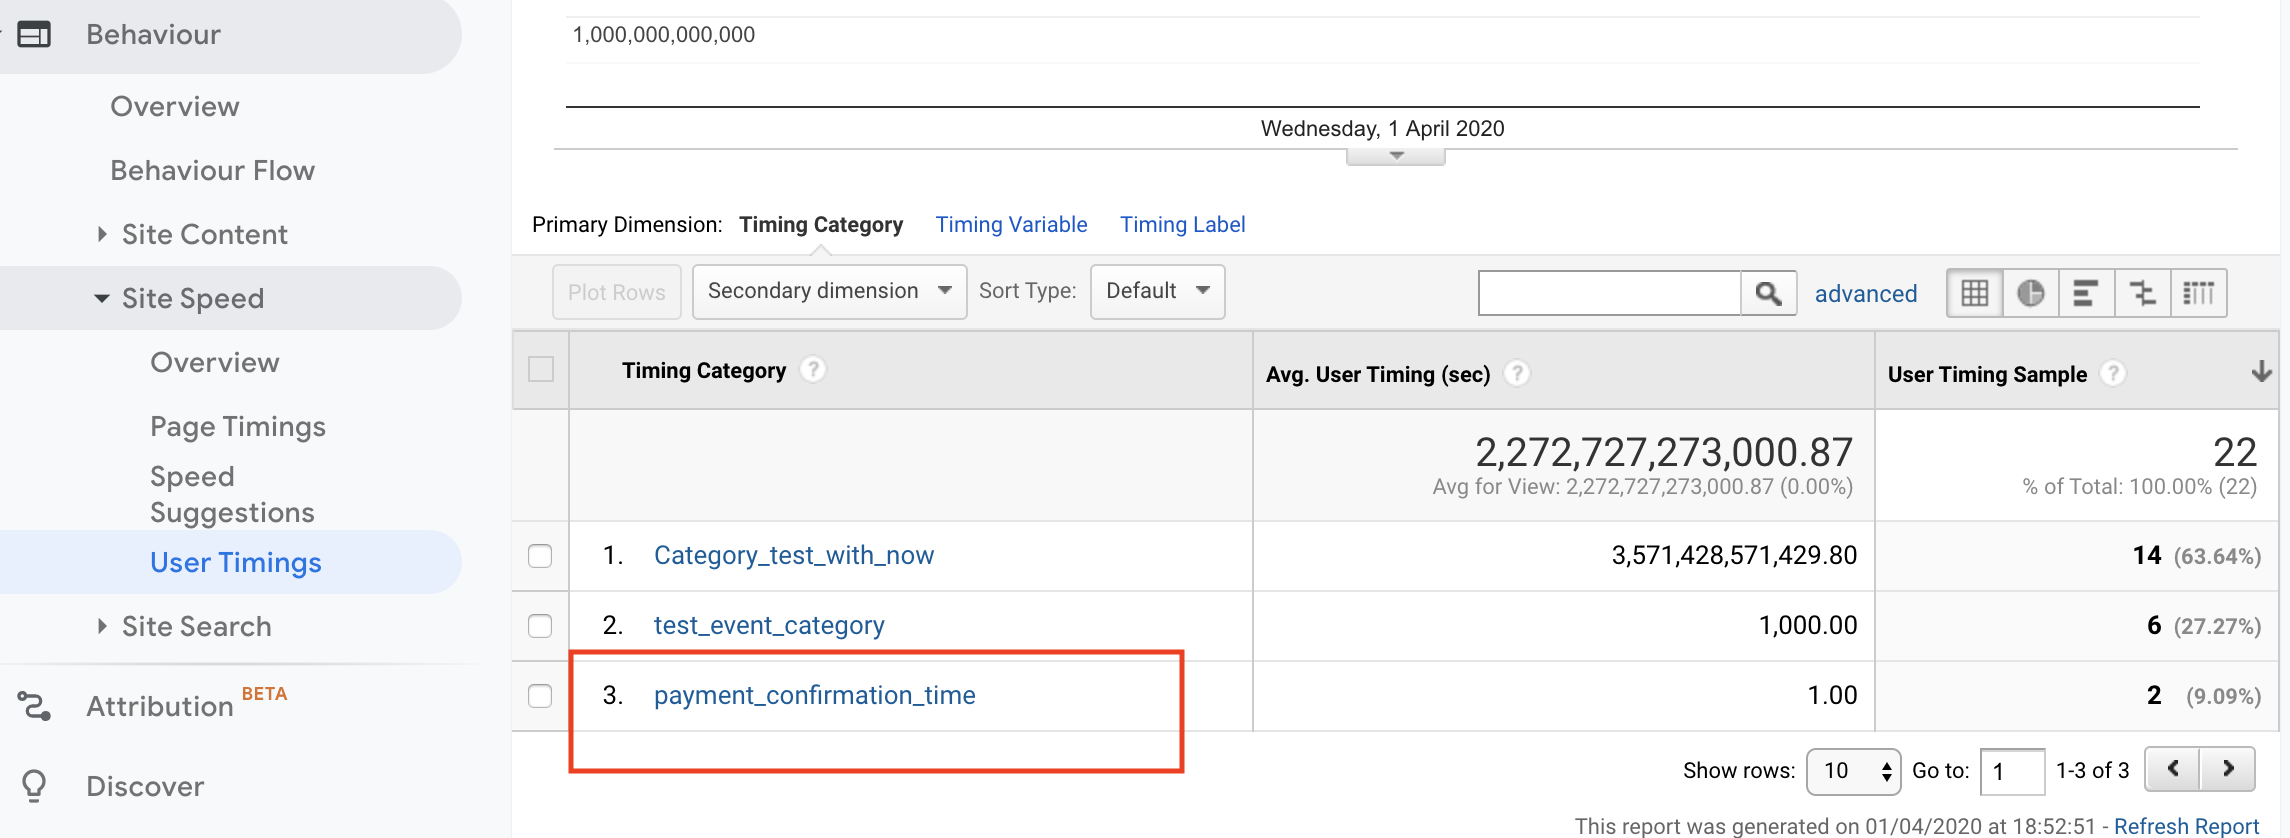
event_category: "payment_confirmation_time",
})
}, 999) // mock 1s to treat payment
}We will see the 'paymentconfirmationtime' is tracked in google analytics and the average time duration is 1s.
3. Create helper function for tracking user interaction response time
If a user action concerns multiple pages, it is not easy to calculate delta time within one file. We need a helper function and save the timestamp data somewhere stable, for example, redux store, window object or cache.
In this project, I have create a helper function trackEventTiming.
trackEventTiming({
  trackType: TRACK_START | TRACK_END,
  eventType: string,
  timeStamp: number,
})
In this way, we can track the start time and end time for the same event, in whatever which page.
For using this function, in the file pay-with-redirection.js
const treatPayment = (router, setIsConfirmed) => {
  trackEventTiming({
    trackType: trackTypes.TRACK_START,
    eventType: "paymentWithRedirection",
    timeStamp: window.performance.now(),
  })
  setIsConfirmed(true)

  setTimeout(function() {
    router.push("/")
  }, 1999) // mock 1s to treat payment
}
Then on the index page,
useEffect(() => {
  const paymentEventIndex = window.eventTimeStamps.findIndex(
    event => event.eventType === "paymentWithRedirection"
  )
  if (paymentEventIndex !== -1) {
    trackEventTiming({
      trackType: trackTypes.TRACK_END,
      eventType: "paymentWithRedirection",
      timeStamp: window.performance.now(),
    })
  }
}, [])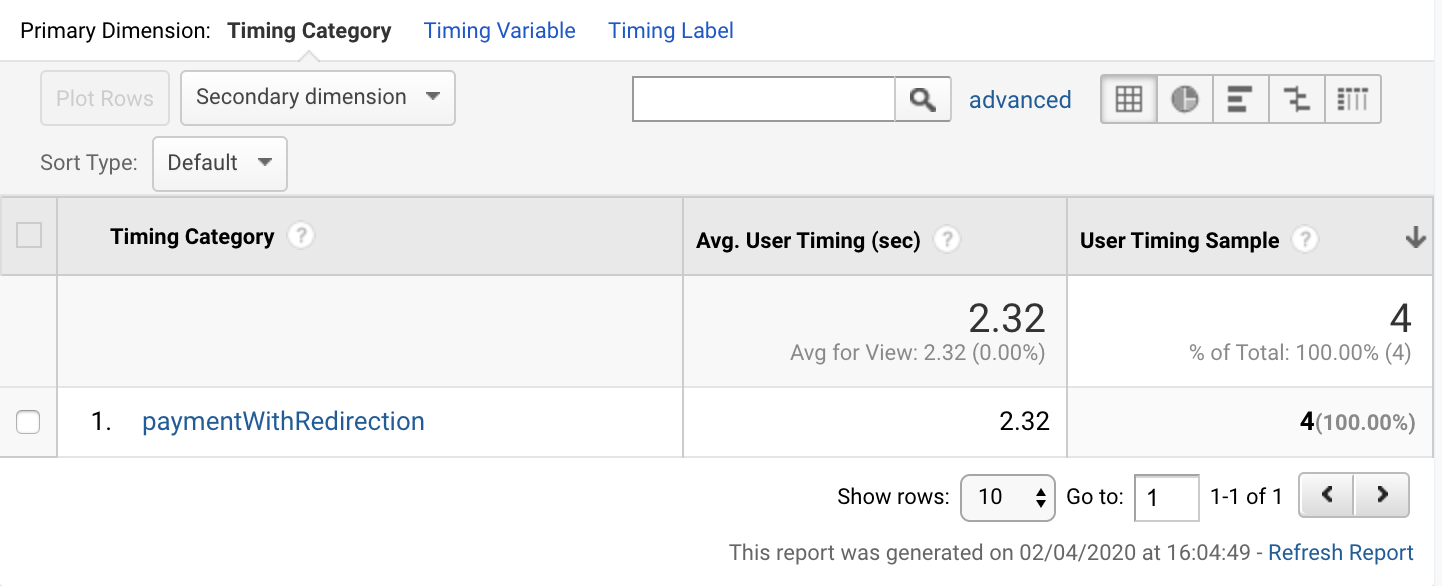
In google analytics, we can see that from clicking on the button to redirect to the home page takes 2.3s on average.
Resources
Demo from https://github.com/AlbertWhite/next-learn-demo/tree/master/6-fetching-data
Using Google Analytics with Next.js
google tag manager: maybe we don't need it. gtag.js is enough.
Add secret in Now deployment for enviroment variables Now secrets are lowercased.


